Bicycle storage · Wholesale sourcing
Bicycle Storage and Parking Solutions for Wholesale Buyers
Start with the installation site. Clear height, floor and wall surfaces, available space and the intended bicycle arrangement shape the model review.
Installation first
Describe the planned installation point
Measurements and surface details help narrow the storage format before a model-level review.
Floor to ceiling
Measure the clear height. Record the floor and ceiling surfaces, nearby walls and the clearance needed to place or remove each bicycle.
Floor supported
Record the usable floor area, bicycle geometry and intended contact points. Add wheel and axle details if the stand design depends on them.
Wall mounted
Record the wall construction, proposed fixing method and clearance around the bicycle for a model-level review.
For a wall-mounted layout, read the horizontal or vertical wall storage guide before you finalize the installation plan.
For layouts around a car, see our garage bike storage guide.
Featured model
HS-T051 floor-to-ceiling storage stand
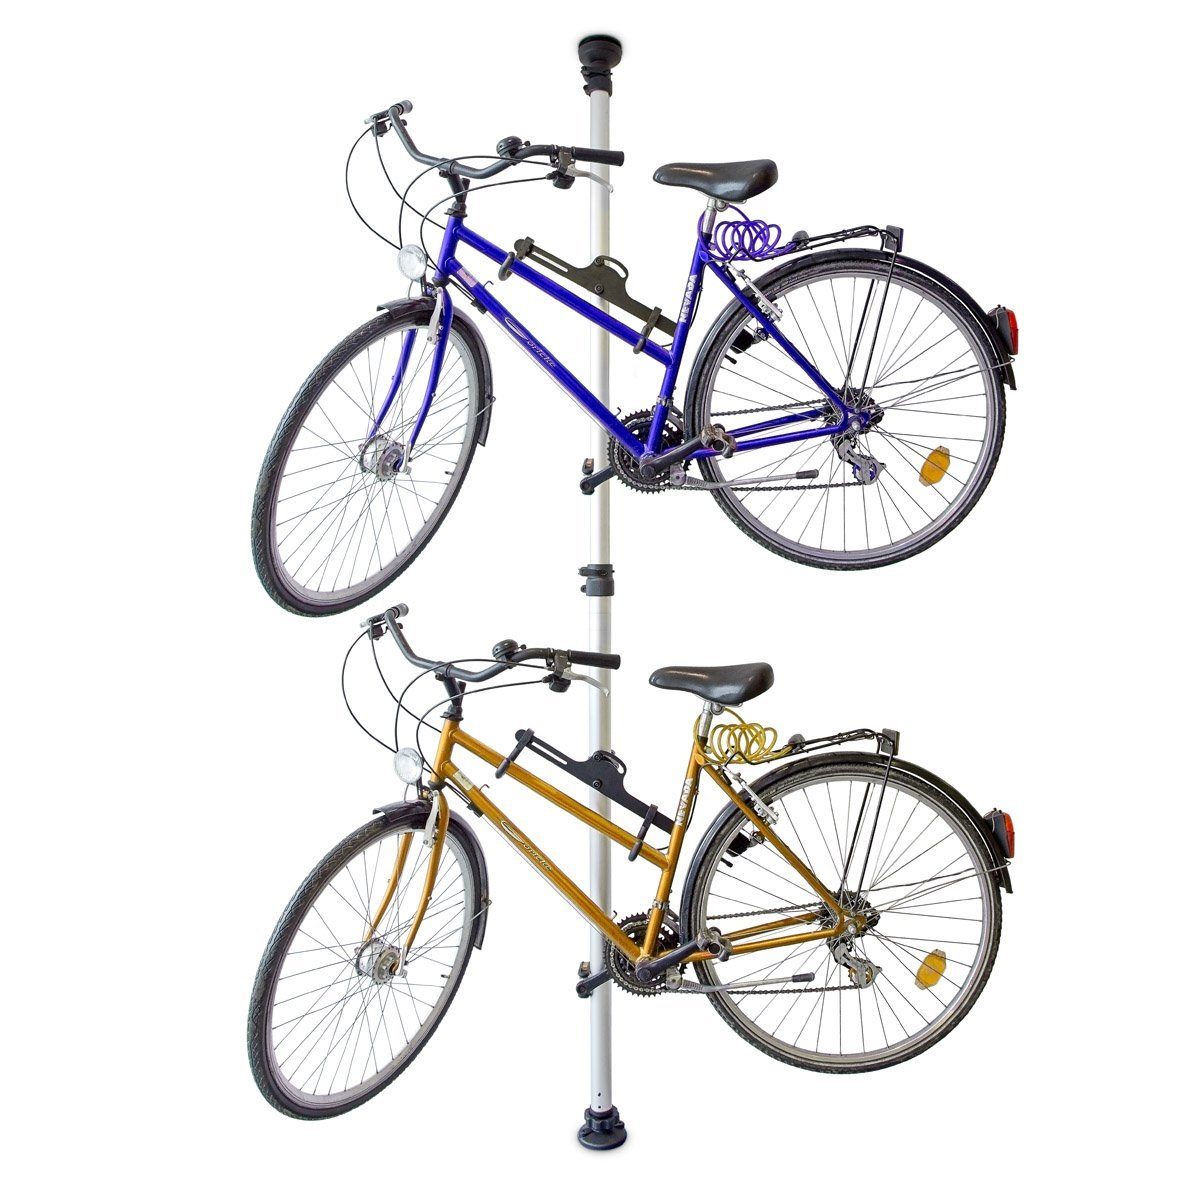
HS-T051 Adjustable Floor-to-Ceiling Bicycle Storage Stand
An adjustable floor-to-ceiling bicycle storage stand. Send the measured installation height and surface conditions so the required configuration can be reviewed.
| Model | HS-T051 |
|---|---|
| Product type | Floor-to-ceiling bicycle storage stand |
| Adjustable height | 1.75–3.2 m |
| Recorded product size | 43 × 12 × 175–320 cm |
| Recorded unit weight | 4.2 kg |
Browse all products
Floor-supported option
HS-T039A Steel Bicycle Stand
HS-T039A is a floor-supported steel bicycle stand, listed for three bicycles in our 2026 catalog. Compare it with the height-adjustable, floor-to-ceiling HS-T051 when planning the bicycle arrangement.
Review HS-T039AChoose the support form
Choose where the stand meets the bicycle
The bicycle contact point helps narrow this range. A floor wheel stand, a wall wheel hook and a frame hanger place the bicycle in different positions.
HS-T013B keeps the wheel at floor level
The front wheel sits between two floor rails beside the tall loop of this L-shaped steel stand. Choose this form when the bicycle should remain upright on the floor. The detachable structure gives one bicycle its own parking position.
Explore HS-T013BHS-T009 hangs the bicycle by a wheel
A curved hook sits above the long vertical wheel tray. This wall-mounted steel rack holds the bicycle off the floor. Its wheel-based contact suits a vertical storage proposal, with the wall plate forming the installation point.
Explore HS-T009The HS-T009B is another vertical wall wheel hook. After the bicycle is removed, its hook section folds toward the backing. See the HS-T009B folding hook guide for the occupied and empty positions.
For a floor-standing vertical option, HS-T013WX supports the rear wheel while the front wheel rises above it. Compare the support points and required space in the wall hook and floor stand guide.
HS-T017L supports the frame on two hooks
Two covered J-hooks sit along a slotted crossbar, at the end of a telescoping wall arm. The hooks meet the bicycle frame for a horizontal display. The arm sets its distance from the wall, while the slots set the spacing of the frame contacts.
Explore HS-T017LFloor parking layouts
Compare individual stands and a shared bike parking rack
Choose a separate wheel position or a connected row based on how bicycles will be arranged in the available space.
HS-T026AF places one wheel between a low guide and contact pieces on its upright arms. Check the intended tyre against both contact areas when planning the position.
HS-T013CF uses a low wheel support and an upright with two hooks. It accepts a front or rear wheel, so the bicycle can face either direction. Check the wheel and tyre against the support and hook positions.
HS-T039B joins wheel positions along shared base rails. Compare the complete row with the intended bicycles, including handlebar widths and the space needed to move bicycles in and out.
Read the floor parking layout guide for a closer comparison of the three designs.
Sourcing information
Prepare the installation details
Send one clear set of information for each installation site and bicycle arrangement.
- Measure the ceiling height or available floor and wall area.
- Describe the floor, ceiling or wall construction.
- Add the bicycle type, frame shape and intended arrangement.
- State the expected quantity, destination country and requested branding, finish or packaging.
Buyer questions
Information to prepare before enquiry
What should buyers measure first?
Measure the clear height, available floor or wall area and the clearance needed to move each bicycle.
Which storage models can buyers compare?
HS-T051 is the height-adjustable, floor-to-ceiling option. HS-T039A is a floor-supported steel bicycle stand, listed for three bicycles in our 2026 catalog.
Which bicycle details should be included?
Include the bicycle type, frame shape and intended arrangement. Add wheel or axle details when the selected stand uses those contact points.
What if the requirement differs from both models?
Send the installation details and requested format so Hongsen can check the requirement at model level.
Model directory
Bicycle storage and parking model directory
Open a model page for its product details and images.
Installation review
Send the site and bicycle details
Include the measured space, surface conditions, bicycle arrangement, expected quantity and destination country with the enquiry.